In the ruthless world of computing, where every degree counts, thermal paste plays a role that is often underestimated but crucial. With the rise of powerful processors and graphics cards pushing systems to the limits of heat dissipation, ensuring optimal transfer of the generated heat becomes an absolute necessity. Yet many users overlook the fact that this thin layer of paste, which connects the processor directly to the heatsink, degrades over time, significantly compromising the performance and longevity of their PC. Whether through intensive use, overclocking, or simply an aging machine, knowing when and how to replace this paste is essential to maintain optimal cooling conditions and guarantee unwavering stability during your gaming sessions, creative work, or professional tasks.
As abnormally high temperatures too often become synonymous with performance drops, noisy fans, or even unexpected restarts, this essential guide walks you through the key steps of renewing thermal paste. We will go beyond the simple technical gesture: you will discover the importance of choosing the right type of paste, good maintenance practices, and the warning signs never to ignore to avoid costly breakdowns. Whether your PC is a large tower or a compact laptop, this guide will provide practical and detailed advice to extend the life of your equipment while maximizing its efficiency.
Through concrete examples, precise comparisons, and a maintenance frequency table adapted to different uses, you will understand why this regular intervention is not a geek’s fancy but a must for anyone concerned with maximum performance and the longevity of their computer. Join us in this world combining technical know-how and passion for hardware, to adopt best practices for flawless thermal dissipation, and a computing experience that lives up to the ambitions of 2026.
- 1 The fundamental role of thermal paste in thermal dissipation and maximum PC performance
- 2 Obvious and hidden signs indicating it’s time to renew the thermal paste of your PC
- 3 Ideal frequency for renewing thermal paste according to your usage and PC type
- 4 How to choose the ideal thermal paste to guarantee effective and lasting cooling
- 5 Step-by-step guide to renew thermal paste on your PC safely
- 6 Continuous maintenance after renewal to prolong your PC’s life
- 7 Common mistakes to avoid when renewing thermal paste for optimal results
- 8 Why renewing thermal paste is essential for overclocking setups and intensive use
The fundamental role of thermal paste in thermal dissipation and maximum PC performance
Thermal paste is a key but little-known component in a PC’s cooling system. Its primary mission is to optimize the transfer of heat between the processor, or CPU, and the heatsink, often made of aluminum or copper, responsible for expelling this heat outside the case. Without thermal paste, the contacting surfaces leave micro-cavities filled with air, a natural insulator that blocks dissipation.
Imagine your processor as a small engine in full activity, generating intense heat. These imperfect junctions can cause local overheating zones, resulting in an alarming temperature rise in the CPU and, consequently, a drop in your machine’s overall performance. This phenomenon can even lead to throttling, that is, an automatic reduction of the processor’s frequency to prevent damage, which results in noticeable slowdown.
Thermal paste fills in these imperfections thanks to its specific formulation, often based on silicone, ceramic, or metallic compounds. It ensures a continuous and homogeneous interface to transfer heat efficiently. If it is not applied correctly, or if it is dry and cracked, it loses its conductive properties, putting your PC’s stability at risk even during light everyday use.
This essential function becomes even more important when overclocking. By pushing the processor beyond factory limits to gain performance, thermal management becomes a critical challenge. A cooling system optimized with quality thermal paste is then vital to prevent the system from overheating or suffering irreversible damage. Many hardware enthusiasts therefore consider regular replacement of this paste as an essential part of their maintenance.
Beyond the CPU, thermal paste also plays a role in heat dissipation for graphics cards, particularly stressed in gaming or 3D rendering contexts. Modern GPUs generate impressive amounts of heat, requiring a reliable and durable thermal interface. Ignoring this maintenance can cause overheating with serious consequences for the stability and lifespan of the component.
In summary, thermal paste is neither a luxury nor a trivial detail, but a vital element that directly conditions your PC’s maximum performance and the ability of its cooling system to operate efficiently. Whatever your use, special attention to this component guarantees better user comfort and prevents premature failures that can be costly in repairs or replacements.

Identifying the moment when the thermal paste has lost its effectiveness may seem subtle at first, but certain symptoms familiar to experienced users will guide you unequivocally. The abnormal rise in your CPU or GPU temperatures is often the first indicator that thermal dissipation is compromised. In modern environments where the normal processor temperature under load generally remains below 80°C, regularly exceeding this limit signals a potential problem.
Another revealing clue lies in the fan behavior. When they spin up to high speed and produce more noise than usual, it’s a sign they are desperately trying to compensate for poor thermal management caused by ineffective thermal paste.
Sudden drops in performance, such as slowdowns, freezes, or lags during gaming sessions or video editing, can also stem from overheating linked to worn paste. In the most severe cases, unexpected restarts or even blue screens may occur: all critical signs of failing thermal dissipation.
A visual inspection, if you are used to handling your hardware, will be very telling. Dry, cracked, or discolored thermal paste indicates advanced aging and increased danger. Conversely, fresh paste has a smooth, homogeneous, and slightly shiny consistency, sign of good thermal conductivity. Never leave this trace unchecked if you notice abnormal behavior.
It is therefore crucial to regularly monitor your system temperatures using specialized software such as HWMonitor, SpeedFan, or Core Temp, which provide real-time data. These represent a valuable tool to anticipate the need for maintenance before damage becomes irreversible.
- CPU/GPU temperatures steadily increasing even at idle
- Fans becoming noisy and spinning at high speed
- Noticeable performance drops during demanding tasks
- Unexpected restarts or crashes under heavy load
- Appearance of blue screens or frequent system errors
These signs must be taken very seriously, as waiting too long can lead to permanent processor damage, a cost far greater than the price of a tube of thermal paste. Regularly check your PC for proactive maintenance, ensuring increased longevity and sustained maximum performance.
Ideal frequency for renewing thermal paste according to your usage and PC type
The lifespan of thermal paste varies greatly depending on usage conditions, which directly influences the recommended replacement frequency. An intensive gamer, for example, will see their paste degrade faster due to repeated and prolonged heat spikes during gaming sessions on resource-hungry titles. Conversely, light office use imposes fewer thermal dissipation constraints, allowing for a longer usage duration.
To better structure this recommendation, here is a table summarizing the suggested frequencies based on usage type:
| Type of use | Recommended frequency to renew thermal paste |
|---|---|
| Intensive gaming and overclocking | 12 to 18 months |
| Professional use (video editing, 3D rendering) | 1 to 2 years |
| Moderate office use | 2 to 3 years |
| Light and occasional use | 3 to 5 years |
| Laptops | 2 to 3 years |
It is important to specify that laptops often show a faster aging of their thermal paste. Compact within a reduced space, processors and GPUs undergo harsher thermal constraints, notably due to less robust cooling systems. Opting for regular checks every two to three years then becomes a recommended habit.
Also keep in mind that harsh environmental conditions — such as dusty or poorly ventilated surroundings — can accelerate deterioration. Similarly, users pushing their equipment to the limit through overclocking should be particularly vigilant and consider more frequent maintenance to preserve maximum performance.
Good thermal paste upkeep is therefore part of a broader thermal optimization strategy, which guarantees better stability and quiet operation of your PC over the long term, including in modern gaming setups.
How to choose the ideal thermal paste to guarantee effective and lasting cooling
The thermal paste market has evolved considerably, now offering varied options tailored to different user profiles and technical needs. Choosing the right thermal paste is key to ensuring efficient heat transfer and effective maintenance that is not limited to a one-time intervention.
The most common types of thermal paste fall into three main categories: ceramic-based pastes, metallic pastes, and classic silicone pastes. Each has advantages and disadvantages to weigh according to your expectations:
- Ceramic thermal paste: it offers an excellent compromise between performance and cost. Easy to apply, non-conductive to electricity, it guarantees satisfactory cooling for the majority of users. Perfect for regular gaming use or advanced office work.
- Metallic thermal paste: often based on silver or aluminum, it delivers superior thermal conductivity, ideal for extreme configurations and overclocking. However, it requires careful application, as it is electrically conductive, which can pose risks if it contacts circuitry.
- Classic silicone thermal paste: the most accessible but also the least performant, it suits lightly stressed systems but should not be favored for intensive use or power-hungry configurations.
Beyond the composition, durability, ease of application (some models come pre-applied), and brand reputation must also be considered. Well-known brands such as Noctua, Arctic, or Thermal Grizzly offer recognized products for their quality and reliability, highly appreciated by demanding users.
Finally, know that thermal paste must be stored under proper conditions, away from heat and humidity, to avoid degrading its properties before application. For guaranteed maximum performance, prefer sealed tubes and check their expiration date.
Adopting the right thermal paste thus guarantees optimal thermal dissipation, better stability of the processor’s frequencies, and a smoother, longer-lasting computing experience over the years.
Step-by-step guide to renew thermal paste on your PC safely
Replacing thermal paste might seem intimidating at first, but with a bit of method and the right tools, it becomes an accessible maintenance task for any knowledgeable hobbyist. Ensuring a clean and precise application is crucial to restoring optimal thermal dissipation.
Here is a detailed protocol to replace your thermal paste without error:
- Preparation: Turn off your PC and completely unplug the power cable. Let the system cool down for at least 30 minutes to avoid any risk of burns or hardware damage.
- Opening the case: Remove the side panels to access the processor and its heatsink. Be careful of dust presence and avoid electrostatic shocks.
- Removing the heatsink: Unscrew the fastenings carefully following a cross pattern, like tightening car wheel screws, to distribute pressure evenly and avoid damaging the processor.
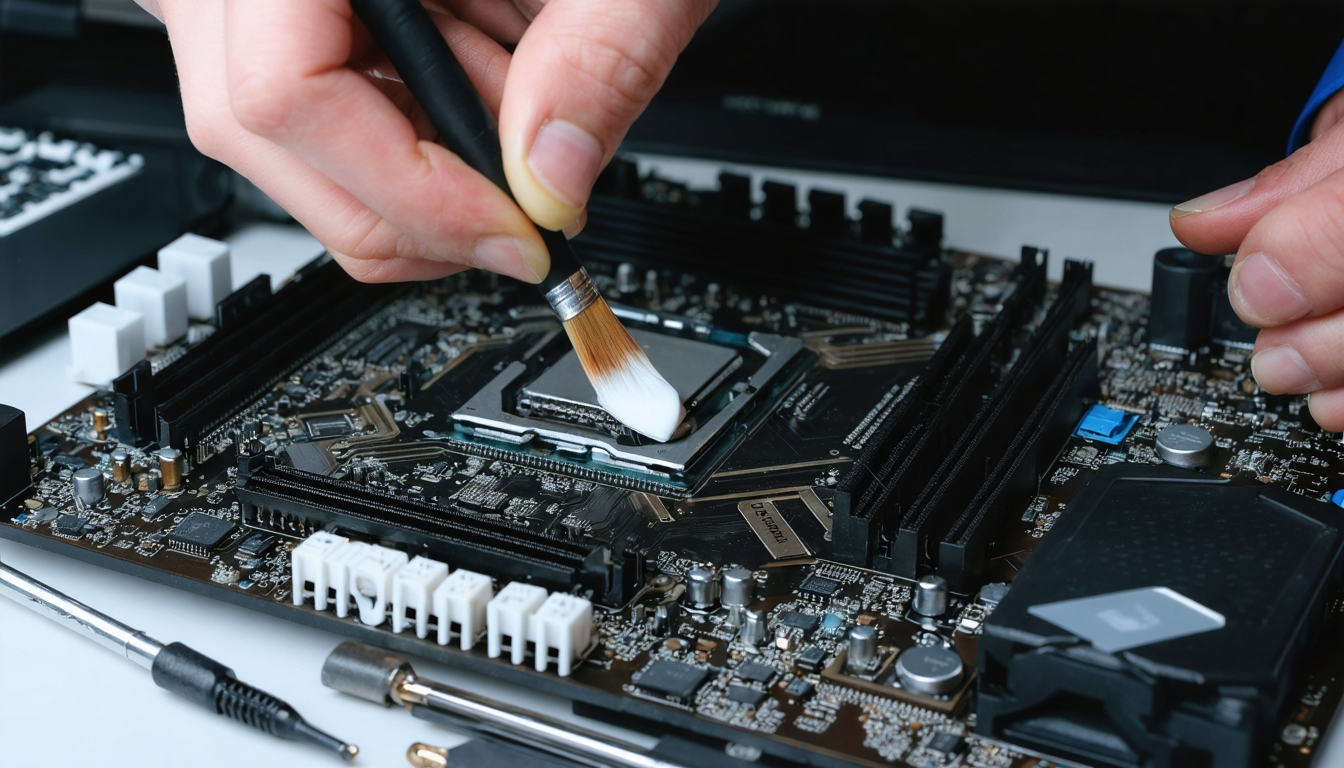
- Cleaning old paste: Using a lint-free cloth soaked with 90% (or higher) isopropyl alcohol, carefully remove all thermal paste residues from the surface of the processor and heatsink. This step is crucial to ensure perfect adhesion of the new paste.
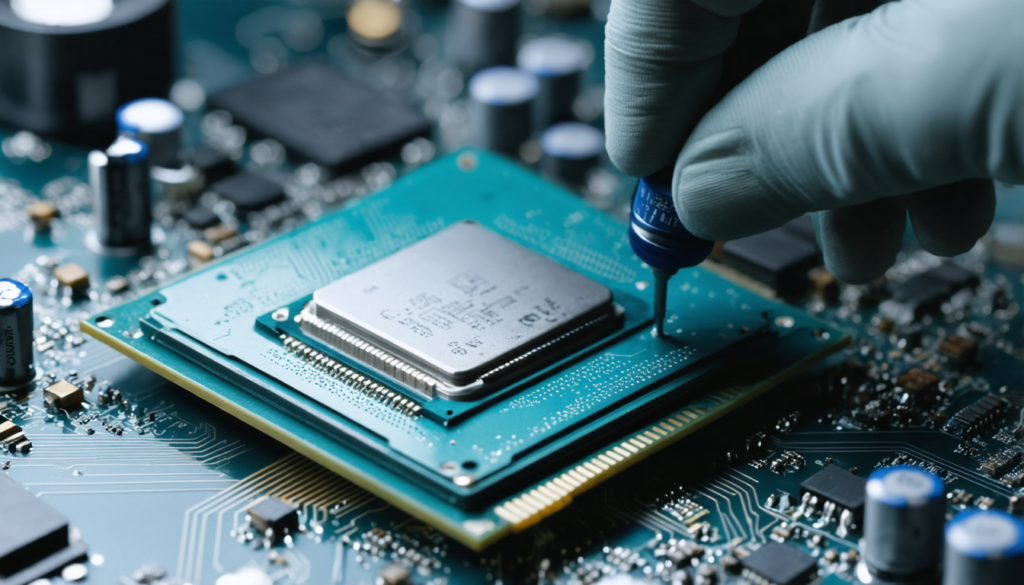
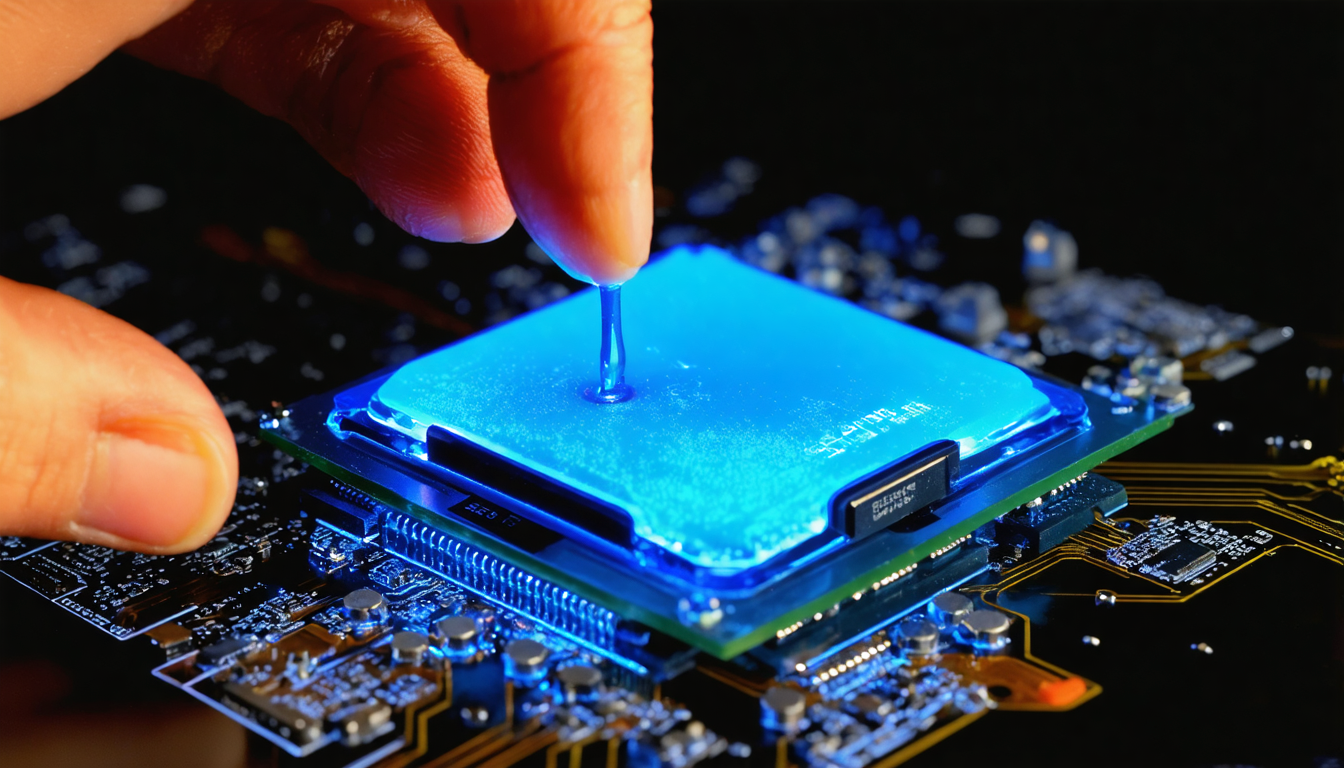
- Applying new paste: Place a small amount, barely the size of a pea, in the center of the processor. When reattaching the heatsink, the paste will spread evenly across the entire surface thanks to the pressure applied.
- Reassembly: Put the heatsink back in place and screw it down using the cross method. Make sure the contact is firm and uniform.
- Closing and testing: Close the case, reconnect the PC, and power it on. Use thermal monitoring software to verify that the temperatures return to normal ranges.
Be careful never to apply too much thermal paste. Excess can create an insulating barrier instead of improving conduction and, in some cases, cause short circuits, especially with metallic pastes. Let your machine breathe, literally, for maximum performance and optimal thermal management.
A balance between precise technique and patience guarantees a successful operation, resulting in a noticeable temperature drop and reinforced stability of your computer, for your daily tasks or gaming marathons.
Continuous maintenance after renewal to prolong your PC’s life
Changing thermal paste is an essential step in your PC’s maintenance, but it fits into a broader care and upkeep approach. After replacement, some simple and regular habits help maintain an efficient system over the long term.
Thermal behavior observation remains paramount. Monitor temperature changes with appropriate monitoring tools and be attentive to system alerts. Well-managed cooling is often an indicator of successful maintenance.
It is also important to regularly clean your case to eliminate dust that disrupts airflow, reduces fan efficiency, and can cause unjustified temperature spikes. A clean and well-ventilated interior optimizes overall dissipation and extends component lifespan.
Also remember to check the proper functioning of fans and other cooling system components. Thermal pastes are not designed to compensate for a failing system: noisy or dirty fans require cleaning or replacement. Likewise, using liquid cooling demands increased vigilance regarding pumps and seals to avoid leaks.
Thus, post-renewal maintenance essentially comes down to a combination of regular monitoring, cleaning, and simple but effective technical checks. This proactive approach will save you many inconveniences and ensure maximum performance for your hardware investment.
Common mistakes to avoid when renewing thermal paste for optimal results
Although the replacement procedure is relatively simple, some frequent mistakes can compromise the benefits of renewing thermal paste. They are often due to lack of experience or hasty work, but are easily corrected with a bit of care.
Among the main errors to avoid are:
- Applying too much thermal paste: Contrary to popular belief, excessive amounts do not increase performance; on the contrary, they can thermally insulate the processor and reduce dissipation.
- Not properly cleaning old paste: Residual old paste reduces good adhesion and the effectiveness of the new layer.
- Handling the processor without care: Risk of bending or physical damage that can cause serious failures.
- Forgetting to check after reassembly: Not monitoring temperatures can mask an unresolved problem or incorrect application.
- Using thermal paste inappropriate for the hardware: For example, basic silicone paste on an overclocked machine may be insufficient.
Taking the time to follow each step, using the right tools and applying the ideal amount will ensure results up to your expectations, noise reduction, and optimal cooling. It also helps prevent more costly interventions due to overheating damage.
Why renewing thermal paste is essential for overclocking setups and intensive use
In the hardware world, overclocking has become a common practice to gain power, but it imposes major thermal constraints. By increasing the frequency and voltage of the processor or GPU, one amplifies heat production, requiring an impeccable cooling system.
Thermal paste plays an irreplaceable role in this context: it ensures that accumulated heat is effectively transferred from the processor to the heatsink. If worn or poorly applied, the risk of overheating dramatically increases, causing not only performance drops via throttling but also potential long-term hardware damage.
In intensive configurations, renewing thermal paste thus becomes a maintenance operation as important as cleaning fans or controlling airflow inside the case. Some professional overclockers change their paste every 6 to 12 months to guarantee optimal cooling and avoid any degradation.
This particular care allows them to achieve maximum performance scores while maintaining durable stability, even under extreme loads. Thermal paste is no longer a simple consumable but a strategic element of performance.
Not renewing thermal paste in this context is a needless risk, negligence that can cost much in terms of time, money, and frustration, especially when your equipment represents a significant investment.