In a world where technology is increasingly integrated into everyday life, building a personal drone becomes an accessible and exciting project. Whether you are a fan of flying gadgets or eager to dive into the world of DIY (Do It Yourself), making a custom flying device offers a unique experience. This comprehensive guide will accompany you through every step, from the initial design to the first flights. You will discover not only how to choose each essential component but also how to assemble them precisely to build a high-performance and reliable drone.
Over the years, drones have revolutionized many sectors, from aerial photography to leisure, agriculture, and surveillance. However, owning a functional drone no longer simply means buying a turnkey model. Building your own drone presents an undeniable advantage: customization. You can design a prototype tailored to your exact needs, whether it’s for fast races, ultra-clear images, or long explorations. In 2026, these flying devices have become more sophisticated but also more accessible thanks to detailed tutorials and a dynamic community.
The construction process follows a step-by-step methodology that allows you to deeply understand the internal workings of the drone. This guide emphasizes mastering technical and mechanical aspects while making learning fun and engaging. You will learn to select the best parts, optimize your budget, and configure your prototype according to criteria of stability and efficiency. The goal is not only to build your drone but also to take pleasure in seeing it evolve in the air, a direct reflection of your personal know-how.
- 1 The essential components to build a high-performance and durable drone
- 2 How to assemble a drone: methodical steps for a successful build
- 3 Essential technical settings to optimize stability and maneuverability
- 4 Why choose DIY to build your drone in 2026? The hidden benefits
- 5 Rules and best practices to know for a compliant and secure DIY drone
- 6 Tips to maintain and improve your DIY drone over time
- 7 Essential resources and communities for successfully completing your DIY drone project
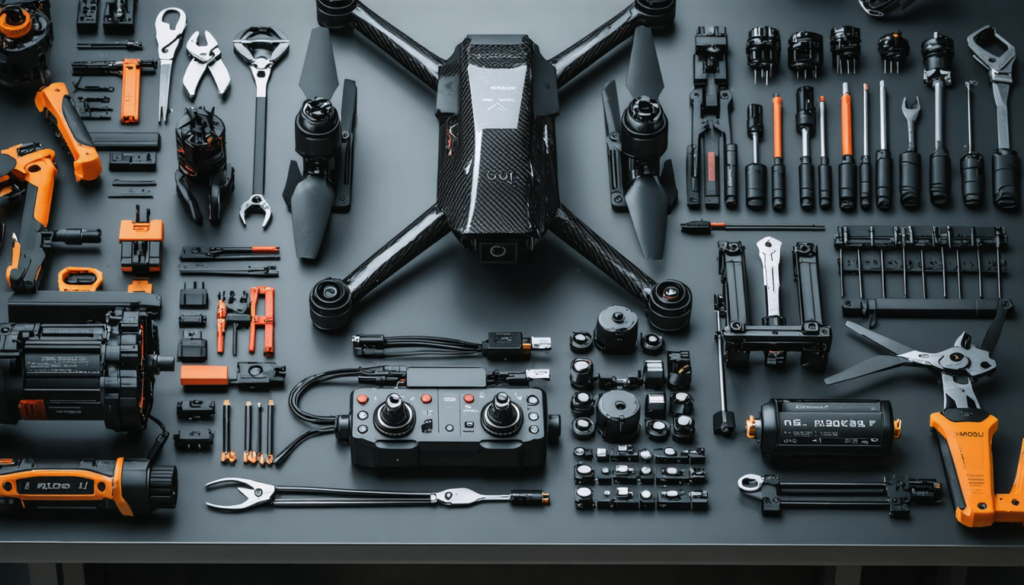
The essential components to build a high-performance and durable drone
Before beginning assembly, it is crucial to identify the fundamental components that form the base of any successful flying device. Each part directly impacts the drone’s performance, stability, and durability. Learning to select the best elements based on your project is one of the keys to your success.
The frame: the light and strong skeleton
The frame is the structure on which all other components rest. In 2026, the trend strongly favors the use of carbon fiber, thanks to its ideal combination of lightness and strength. Choosing a suitable frame ensures not only solidity during harsh landings or crashes but also improves the overall maneuverability of the device.
Sizes vary according to use. For example, a drone intended for aerial photography will often be bulkier than one designed for FPV (First Person View) racing. The standard size for the latter is around 210 to 250 mm. A practical experience shared by many passionate builders is using a carbon frame, which prevents the quick breakage of early plastic versions. It is an investment largely amortized over the long term.
Brushless motors: controlled power
At the heart of propulsion are the brushless motors, essential for ensuring optimal power and controlled energy consumption. Unlike brushed motors, their design eliminates internal friction, which reduces wear and increases lifespan.
The selection of a motor depends on multiple criteria, notably size, KV (number of revolutions per volt), and compatibility with your battery. Appropriate values vary depending on use, with more powerful motors for racing drones and more balanced models for stable video footage. During configuration, also monitor processor load during your tests to avoid overloading the flight controller or computer, which can affect overall performance.
ESC (Electronic Speed Controller): the speed regulator
Each motor is associated with an ESC that governs rotation speed. It is a crucial component since it translates the flight controller’s instructions into the voltage necessary to control the motor. Quality ESCs improve your drone’s responsiveness and enable more precise maneuvers.
Installing these ESCs requires particular attention, especially during soldering. Connections must be solid to avoid any failure in flight, which could have serious consequences.
Suitable propellers: balance between weight and efficiency
Propellers play a decisive role in lift and maneuverability. It is advisable to opt for carbon propellers, known for their strength and lightness. The “5045” type, for example, is highly appreciated in the FPV community because it offers a good compromise between thrust and endurance.
The choice of propellers must closely match the motors and configure a harmonious set so that the drone flies stably. Additionally, always replacing damaged propellers improves safety during flights.
The flight controller: the electronic brain
The flight controller groups all essential sensors (accelerometer, gyroscope, sometimes GPS) and allows optimal motor management. Models like the Naze32 with Betaflight firmware are still very common today due to their stability and large support community.
This component is comparable to the processor in a gaming computer; its quality directly influences the drone’s responsiveness. It is vital to install a flight controller compatible with your assembly and offering enough features for your ambitions (automatic return, assisted flight modes, etc.).
The LiPo battery: a powerful energy source
Finally, to power the whole setup, the battery is a critical element. In 2026, LiPo (Lithium-Polymer) batteries maintain their status as a benchmark thanks to their high energy density and lightweight. Capacity, expressed in milliampere-hours (mAh), affects the total autonomy of the drone, while the “S” nomenclature (3S, 4S, 6S) indicates the number of cells in series and thus the maximum power delivered.
Choosing a suitable battery balances flight time with maneuverability and speed. A battery that is too heavy can weigh down the drone, while an insufficient battery will limit its performance.
| Component | Function | Average Price (€) |
|---|---|---|
| Carbon fiber frame | Central drone structure | 20 – 40 |
| Brushless motors (x4) | Propulsion | 30 – 60 |
| ESC (x4) | Motor speed control | 20 – 40 |
| Flight controller | Electronic brain | 20 – 50 |
| LiPo battery | Power supply | 16 – 30 |
In total, a basic drone can therefore be built for an amount ranging between 90 and 200 euros, excluding the radio controller and FPV-related accessories. This budget remains accessible, especially if you plan to acquire parts progressively.
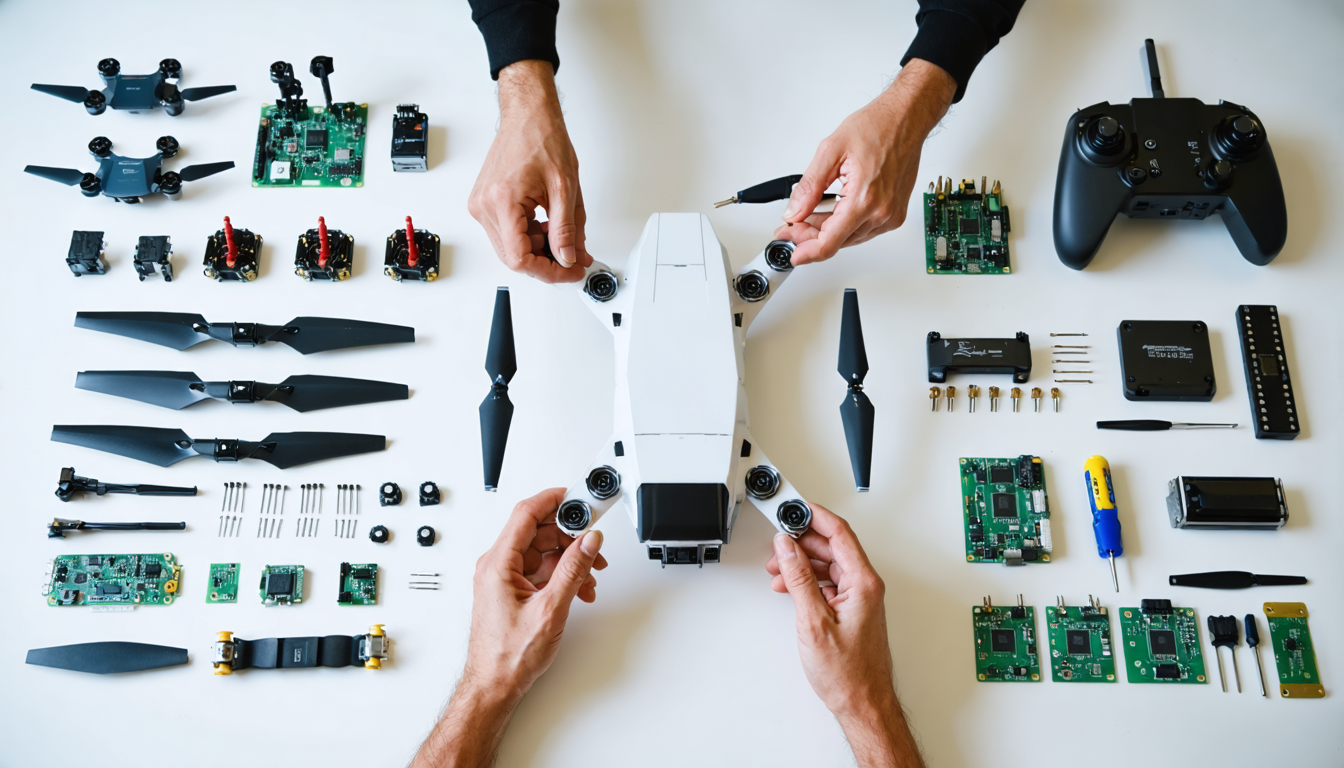
How to assemble a drone: methodical steps for a successful build
Assembly is the most tangible phase in building your DIY drone. Each step must be performed carefully, as mistakes can compromise the device’s performance or even safety. Here is a precise and detailed sequence that will guide you throughout your prototype’s manufacture.
Planning and choosing objectives
Having a clear vision from the start is essential. If your drone is meant for aerial photography, you will need a stable frame capable of carrying a lightweight camera. Conversely, for FPV racing, priority is given to speed, maneuverability, and robustness. Skipping this step can lead to incompatibilities when purchasing components.
For illustration, take the case of Alexandre, a video enthusiast who started with a classic drone but had to modify his frame and motors to carry a heavier camera. His experience shows that anticipating needs avoids unnecessary expenses and later disappointments.
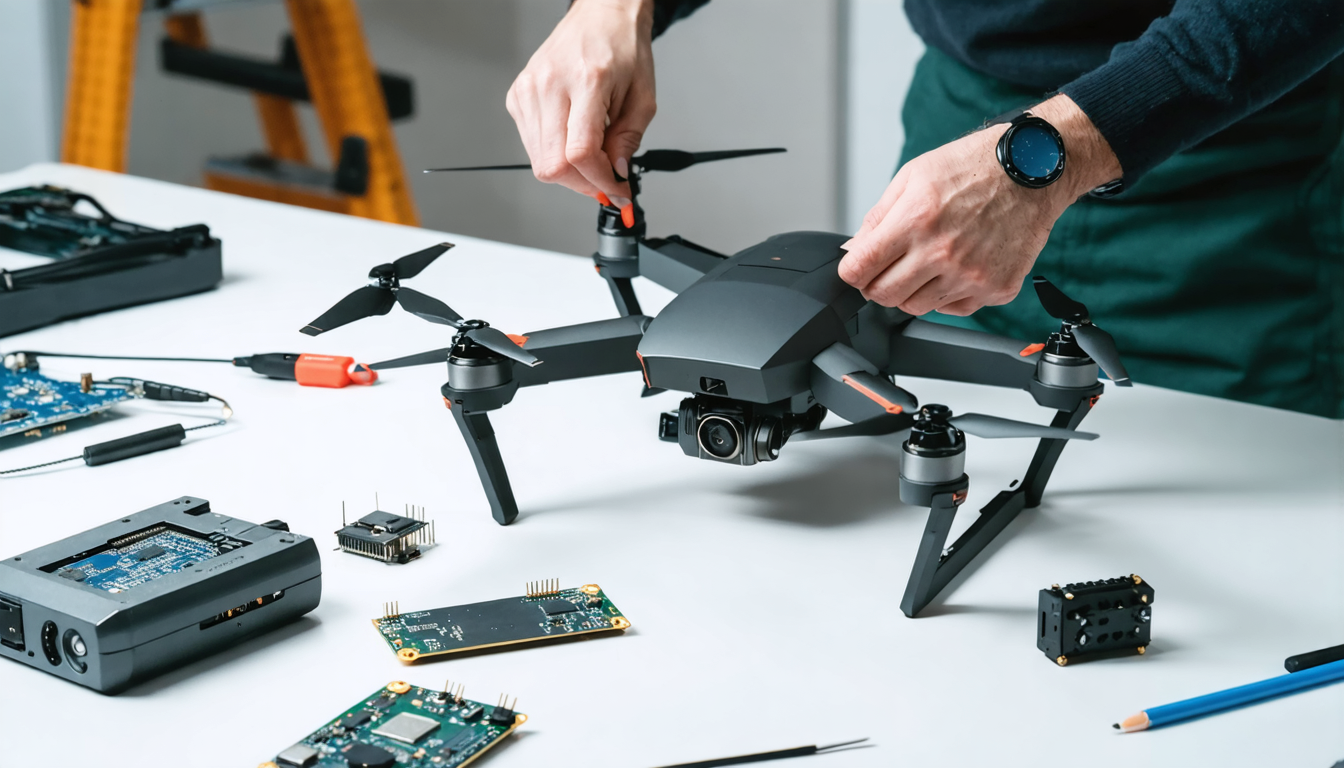
Mechanical assembly of the frame and motors
First, install the frame on a stable surface. Attach the motors to the ends of the arms, respecting their orientation. Correct rotation is crucial for control in flight: a motor mounted upside down can propel the drone into the ground! Various video tutorials help verify proper installation.
Next, solder the ESCs to the motors and connect them to the power distribution board (PDB). Making clean and solid solder joints is one of the key steps. Don’t hesitate to use heat shrink tubing to carefully insulate each connection.
Installing the main electronic components
Then attach the flight controller at the center of the frame using anti-vibration mounts to minimize disturbances during flight. Connect the radio receiver to this controller to establish communication with your radio controller. If you are opting for an FPV system, install the camera and video transmitter now, minding positioning to avoid interference.
Software configuration and calibration
Once hardware assembly is complete, the logical next step is drone configuration. Using dedicated software, like Betaflight, you will calibrate the ESCs to ensure each motor responds correctly. You will also adjust stability parameters, which play a major role in flight feel and safety.
Here is the list of essential steps:
- Assemble the frame according to the manufacturer’s instructions
- Attach the motors respecting the correct orientation
- Install and solder the ESCs to the motors and PDB
- Mount the flight controller with anti-vibration supports
- Connect the radio receiver
- Install the FPV system (optional)
- Configure and calibrate via dedicated software
- Attach the propellers after complete programming
Following this order guarantees progressive construction, limiting errors and optimizing the final quality. Starting with the mechanics before moving to software configuration avoids tedious recalibrations.
Essential technical settings to optimize stability and maneuverability
The success of a drone depends not only on assembly but also on technical configuration. Mastering the settings makes it possible to get a perfectly balanced, safe, and enjoyable flying device.
ESC calibration and throttle management
ESCs must be calibrated precisely to ensure each motor corresponds uniformly to the commands given. This prevents some motors from spinning faster than others, which could disturb the flight.
This calibration often requires synchronization between the flight controller and the radio controller. In practice, this translates into a step-by-step software procedure where you will gradually vary the throttle (accelerator) using Betaflight software or other compatible tools.
PID tuning and stability gain
Flight controllers use PID (Proportional, Integral, Derivative) algorithms to correct drone movements. These settings influence responsiveness to movements, vibrations, and the precision of the device’s hold in the air.
A poorly tuned drone is either too nervous, making it difficult to pilot, or too soft, which can make it unstable in the wind. Finding the perfect balance sometimes requires trials, gently adjusting gains to achieve smooth and controlled trajectories.
Practical tests before first takeoff
Before the first flight, low-altitude tests in a safe area are crucial to verify motor efficiency and drone reactions. Special attention should be paid to:
- Motor orientation
- Propeller rotation
- Response to radio controller commands
- Initial stability during hover
- Absence of excessive vibrations
This step-by-step process allows identifying and quickly correcting any defects, ensuring a pleasant and safe piloting experience.
Choosing to build your own drone is not limited to saving money or technical challenges. In 2026, the DIY movement is more than ever a vector of personal innovation and technological engagement.
Significant financial gain
The consumer drone market remains dynamic with many preassembled models. Nevertheless, building a drone yourself often allows considerable cost reduction by carefully selecting each component according to your budget and needs. This approach also avoids fees related to unwanted options or accessories, which inflate commercial versions’ prices.
Customizable and upgradeable
With a DIY drone, you can choose from the start features suited to you – camera, navigation systems, sensors, or specific flight modes. This modularity offers the possibility to upgrade your prototype progressively, improving motors, battery, or controller according to emerging needs.
In-depth technical understanding
Building your drone involves understanding internal mechanisms, aerodynamic constraints, and electronic interactions. This technical knowledge makes you autonomous to perform repairs, modifications, or future tunings.
You are no longer a mere user but a true builder able to adapt your device to all situations, which is valuable in a professional context or for demanding enthusiasts. This matches the same logic as when a gamer chooses their own setup for a high-performance computer, understanding the synergy between each component in detail.
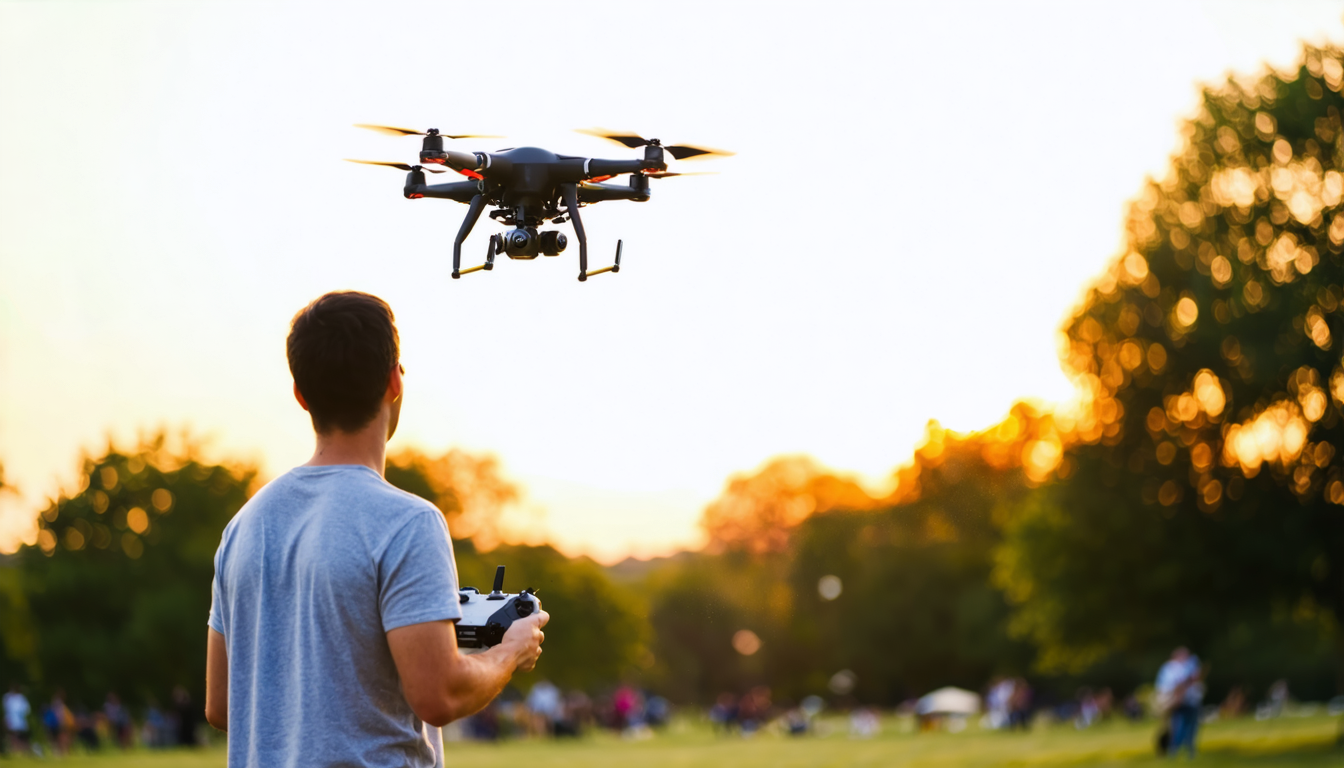
A unique pleasure and pride
The moment your device lifts for its first flight is incomparable. This experience reflects careful work, blending patience, method, and creativity. Each crash or issue is a learning and continuous improvement opportunity.
This personal journey between learning and success gives extra meaning to using your drone, often a source of lasting motivation and enthusiasm.
Rules and best practices to know for a compliant and secure DIY drone
Building a drone falls within a strict legal framework that must be respected to preserve everyone’s safety and avoid legal issues.
Stay informed about local regulations
Depending on the country, legislation regulates drone use on several points: authorized flight zones, altitude restrictions, registration obligation, or even filming bans for certain sensitive areas.
For those undertaking drone construction in 2026, it is essential to consult official websites of local aeronautical authorities. For example, in Europe, the EASA (European Union Aviation Safety Agency) publishes harmonized rules.
Respect prohibited or regulated zones
Respecting prohibited areas (near airports, heavily populated urban zones, military sites) is a priority. Increasingly, mobile applications provide real-time updated maps of safe flight zones, an essential resource for DIY drone pilots.
Safety rules and advice before each flight
It is also recommended to:
- Check the general condition of the drone (propellers, batteries, fasteners)
- Choose an open space and avoid crowded areas
- Perform low-altitude preflight tests
- Have a radio controller with a reliable signal and avoid interferences
- Respect safety distances from people, animals, and buildings
These rules aim to limit accident risks and preserve the reputation of the drone enthusiast community.
Tips to maintain and improve your DIY drone over time
Building a drone is only the first step. You also need to take care of it to extend its lifespan and optimize its performance through use.
Regularly check component condition
After each session, inspect the propellers for any cracks or deformations. Also check solder joints and connectors on the ESCs and flight controller, as vibrations can cause failures.
Promptly replacing worn or damaged parts prevents minor problems from causing major malfunctions. This discipline is essential especially for drones carrying LiPo batteries, which are more sensitive to aging.
Software updates and settings optimization
Flight controller firmware is regularly enriched, offering new features or improvements. Stay up to date with the latest Betaflight versions or compatible alternatives to benefit from technical advances.
Use these updates to regularly recalibrate the drone and adjust PID settings based on previous flight experiences. These actions refine maneuverability and ensure the best possible stability, even in difficult conditions.
Gradual customization according to your needs
Over time, you can consider installing additional modules such as:
- A GPS for automatic tracking
- Anti-collision systems
- Specialized cameras (thermal or high resolution)
- Higher-capacity batteries
These upgrades transform a basic drone into a true flying device adapted to advanced uses while retaining the satisfaction of a fully built project.
Essential resources and communities for successfully completing your DIY drone project
Starting drone construction often comes with a phase of research and exchange with other enthusiasts. In 2026, a wide range of resources is available to help you step by step.
Video tutorials and online guides
Platforms like YouTube abound with specialized tutorials regularly updated to match the latest technologies. Dedicated channels detail both mechanical construction and programming or software configuration.
Specialized forums and groups
Joining forums such as RCGroups, FPVLab, or Discord groups allows you to receive personalized support, share experiences, and benefit from concrete tips. You can also ask for help in case of technical problems or hesitations on material choices.
Sales sites and parts comparison tools
To purchase your components, favor recognized sites that offer clear catalogs and reliable user reviews. Some sites also provide comparison tools to guide you towards the parts best suited to your project and budget.
Essential lists to start your DIY drone:
- Carbon fiber frame of suitable size
- Compatible brushless motors
- ESC matching the motors
- Flight controller with popular firmware
- LiPo battery balanced between weight and autonomy
- Radio controller with appropriate receiver
- Configuration software (e.g., Betaflight)
- Optional accessories: FPV camera, video transmitter, anti-vibration mounts
Integrating these resources into your approach will help you overcome difficulties and build a reliable and high-performing drone, step by step, with confidence.