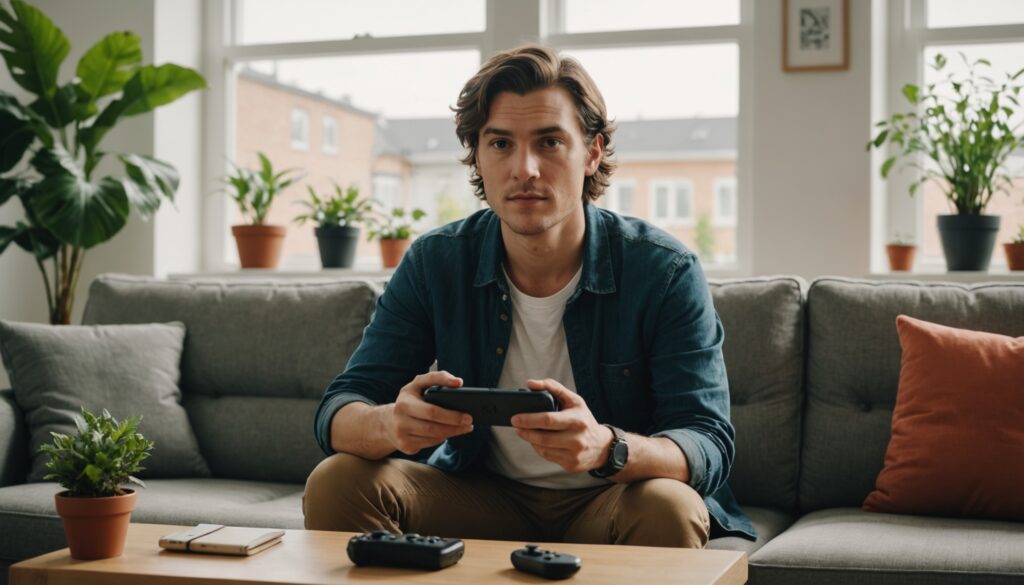
Since its release, the Nintendo Switch console has established itself as an essential pillar of video gaming, offering exceptional flexibility between handheld and living room play. But to fully enjoy its features, mastering the controller connection remains essential. Whether you are a casual player or an enthusiast seeking an optimal setup, this comprehensive guide will walk you through step by step to set up your Switch controller hassle-free, whatever it may be. In 2026, technologies have evolved, but the basics remain indispensable. Discover how to sync your Joy-Con, Pro controllers, or even wired and GameCube controllers, to fully exploit your console’s potential.
The world of the Switch controller has expanded with various options suited to different types of players. Between the small Joy-Con controllers, perfect for playing anywhere, and the traditional Pro controller, more comfortable for long sessions, each controller connection method meets specific uses. Whether you play solo or multiplayer, understanding configuration and guaranteed pairing ensures a smooth and enjoyable gaming experience.
- 1 The different types of controllers compatible with the Nintendo Switch and their connection modes
- 2 Detailed steps to connect your Joy-Con to your Nintendo Switch
- 3 Effectively setting up and syncing the Nintendo Switch Pro Controller
- 4 Using multiple controllers simultaneously for multiplayer sessions on Nintendo Switch
- 5 Troubleshooting common issues related to Switch controller connections
- 6 Advanced customization and tips to optimize your Switch controller experience
- 7 Essential accessories for an optimal Switch controller experience
The different types of controllers compatible with the Nintendo Switch and their connection modes
Before even proceeding with the connection, it is crucial to choose the right Switch controller. The choice will greatly influence the pairing process and the quality of your gaming experience. In 2026, Nintendo offers even more compatible options, making the Switch universe flexible and open.
Joy-Con: portable versatility and multiplayer
Joy-Cons are the iconic small controllers that come with the console. They allow wireless or attached play, fixed directly to the side rails of the console. This dual functionality is perfect for players wishing to quickly switch from handheld mode to TV mode. Each Joy-Con is considered an independent unit, allowing you to accommodate up to eight controllers, potentially sixteen Joy-Cons, during lively multiplayer sessions.
Joy-Cons are lightweight, ergonomic, although sometimes a bit small for long sessions. Their connection mode can be via simple attachment to the console or by synchronization through the SYNC button, located between the SL and SR buttons, offering freedom of wireless use.
Pro Controller: ergonomics and extended battery life
Although Joy-Cons remain the signature of the Nintendo Switch, many prefer the Pro controller for its more classic and comfortable grip. Its shape resembles Xbox controllers, making it intuitive for traditional console veterans. The Pro controller connection is done either wirelessly via the SYNC button or with a USB-C cable plugged directly into the dock, a plus when you want to charge while playing.
The Pro controller benefits from very good battery life, reaching up to 40 hours, ideal for marathon sessions. In 2026, it’s also possible to optimize this connection by activating certain options in the Switch settings, such as automatic cable synchronization, a great tip for those who frequently switch from one console to another.
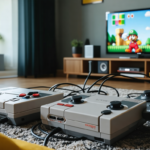
Wired controllers and GameCube: competitive fidelity
For purists and competitors, the wired controller remains a safe and reliable choice. Plugged in directly via USB, it eliminates any battery or latency issues. Nintendo has also maintained support for GameCube controllers through a specific adapter, highly appreciated by fans of games like Super Smash Bros.
The wired controller connection is immediate and requires little configuration, a significant advantage for competitive gaming where every millisecond counts. These older methods, though less flexible, remain very relevant in 2026 for unmatched stability.
| Controller type | Main connection method | Special features |
|---|---|---|
| Joy-Con | Direct attachment or wireless connection (SYNC button) | Count each Joy-Con as one unit; ideal for multiplayer |
| Pro Controller | Wireless via SYNC or USB-C cable | High battery life, superior ergonomics |
| Wired Controller | Direct USB connection | No battery, low latency |
| GameCube Controller | Via USB adapter | Preferred for Smash Bros competitions |
Detailed steps to connect your Joy-Con to your Nintendo Switch
Whether you are a beginner or experienced, the Joy-Con controller connection often remains the most intuitive and quick method. For a seamless experience, it’s important to understand the two main pairing modes: physical attachment or wireless.
Joy-Con connection via attachment
The most well-known method is sliding the Joy-Cons into the console rails. You will hear a reassuring click, a sign of immediate connection. This synchronization is automatically saved by the console, allowing you to remove the controllers without having to redo the operation.
A very practical advantage: during gameplay, you can switch from handheld use to TV use by attaching or removing the Joy-Cons without going back through the controllers menu. This flexibility has been a strong point of the Nintendo Switch since its launch.
If you prefer to free yourself from cables or if you are playing on a Switch Lite which does not have rails, synchronization via the SYNC button remains simple and effective.
Here are the steps to follow:
- From the home screen, select “Controllers” then “Change Grip/Order.”
- On each Joy-Con, press and hold the SYNC button, located between SL and SR, until the lights turn on.
- Watch the flashing green lights, then wait for the message “Synchronization complete” to appear.
Once connected, you can configure the orientation of your Joy-Cons according to your preferences. For vertical use, keep the + / – buttons at the top and press L and R; for horizontal use, orient the slot upwards and press SR and SL.
Mastering these details allows you to transform each Joy-Con into a standalone controller, ideal for casual multiplayer without additional equipment.
Effectively setting up and syncing the Nintendo Switch Pro Controller
While the Joy-Con is perfect for nomadic gaming and versatility, the Pro controller stands out as the essential choice for prolonged sessions. Its connection varies depending on your preferences and hardware.
Simplified wireless synchronization
Connecting a Pro controller wirelessly basically uses the same process as for the Joy-Cons, but the SYNC button is located on the top, near the USB-C port.
After turning on your Switch, go to “Controllers” then “Change Grip/Order.” Hold the SYNC button until the controller appears on the screen, and the player indicator light stays on to indicate connection. At this stage, you are ready to play wirelessly.
USB-C connection with the dock: charging and synchronization
The Pro controller can also be synchronized by cable, a highly appreciated option to never run out of battery. Simply plug it into the dock using the provided USB-C cable. The console immediately detects the controller, and the indicator light stays solid to signal synchronization.
By activating the “Wired connection for Pro controllers” option in the Switch settings, you benefit from simplified pairing if you regularly switch consoles. This feature is particularly useful in 2026 in gaming venues or events where fast pairing is a real plus.
Using multiple controllers simultaneously for multiplayer sessions on Nintendo Switch
The Nintendo Switch’s capacity to handle up to eight controllers simultaneously opens the door to memorable shared gaming experiences with friends or family. However, understanding how controllers are counted is fundamental to avoid any inconvenience.
Each Joy-Con counts as a separate unit. Two Joy-Cons combined into a single controller therefore occupy two slots. Consequently, a full multiplayer session can include eight Pro controllers, or several combinations of Joy-Cons and Pro controllers, as long as the total does not exceed eight units.
To better organize your game night, consider checking the list of connected controllers and player configuration in the Switch settings. You can assign each controller to a specific player and change the order so everything is clear during the game.
- Always check that controllers are charged before a session.
- Avoid electronic interference in the gaming environment.
- Perform a connection test before welcoming any new player.
- Use the “Change Grip/Order” function to easily redistribute controllers.
Sometimes the controller connection does not go as planned. Here are some tips based on real experiences to quickly fix these issues and get back to gaming without wasting time.
Detection and synchronization problems
If your console does not detect the controller, make sure it is sufficiently charged. Nothing worse than a simple dead battery causing a false alert. Also check the proximity to the console: stay within three meters to avoid any signal loss.
If the wireless connection flashes without succeeding, wait a little longer. Sometimes patience is the key to success. In case of persistent blockage, restart your console by holding the POWER button for at least three seconds, then try syncing again.
Conflicts with metal structures or electronic devices
The Bluetooth signal can be disturbed by various objects or devices. Distance yourself from Wi-Fi routers, repeaters, microwave ovens, or metal furniture that can interfere with the connection. In 2026, despite technological improvements, these interferences remain a frequent cause of failure.
Complete reset and desynchronization
For total desynchronization, go to “Controllers and Sensors” in the Switch settings, and use the “Disconnect Controllers” function by holding the X button.
In case of repeated malfunctions, resetting the Joy-Cons can solve the problem. To do this, remove them, hold the SYNC button until the lights flash faster, then reconnect.
Advanced customization and tips to optimize your Switch controller experience
Beyond simple connection, the Nintendo Switch offers advanced options to customize your controller management. In the Switch settings, you can change button assignments, calibrate analog sticks, and adjust the sensitivity of motion sensors.
These options are particularly useful for demanding players who want to adapt their controller to their playstyle, especially in FPS games or fighting games where precision is key. For example, changing joystick sensitivity can greatly improve aiming in shooting games.
Another tip concerns vibration management. Reducing or disabling haptic feedback can extend your controllers’ battery life, a significant advantage during long sessions.
- Regularly calibrate your controllers to avoid stick drift.
- Experiment with button configuration according to the games.
- Take advantage of the motion control feature for more immersion in certain titles.
- Select modes that reduce power consumption.
Essential accessories for an optimal Switch controller experience
To improve comfort and durability of your controllers, certain accessories prove essential in 2026. For example, ergonomic grips for Joy-Cons provide a better hold, reducing fatigue during long sessions.
Multi-charging stations simplify battery management, especially when owning multiple controllers. They ensure all your controllers are ready to use at any time, preventing the frustration of a dead battery during gameplay.
Finally, a GameCube adapter allows you to reuse classic controllers for competitions or for Nintendo nostalgia, strengthening the Switch’s versatility.
| Accessory | Use | Main benefit |
|---|---|---|
| Ergonomic Joy-Con grips | Comfort and improved grip | Reduces hand fatigue |
| Multi-charging station | Simultaneous charging of multiple controllers | Simplified battery management |
| GameCube USB adapter | Connection of GameCube controllers | Competitive compatibility |
| Reinforced USB-C cables | Reliable connection and charging | Durability and fast charging |